Now i don’t know about you but i hate the new category based control panel that was introduced in windows xp (below).

I much prefer the older “Classic View” in the control panel becuase i can find the applets that i want much easier this way. There is one problem, that is that the control is now flooded with so many applets and most of the time i am only using a couple of these. It would ne so much better if i could get rid of the ones that i didnt need…
well there is such a way and I’m gonna show you guys (and gals) how to do it.
-
Click the start button
-
if your in xp then click run if you in vista use the search bar
-
type in regedit to open the registry editor
-
in the registry editor go to
-
HKEY_LOCAL_MACHINE\SOFTWARE\Microsoft\Windows\CurrentVersion\ControlPanel\don’t load

as you can see from the name of the key “dont load” any strings that are in here whose name is the same as the applet you want to hide will not be loaded when the control panel is opened. So all we need to do is put in a new string of the applet we want to hide.
-
right-click “dont load” key
-
go to new
-
click on string value

now in your new string type the name of the applet you want to get rid of, the actual names of the applets are different from what you see on the control panel so i have listed some below. in the pciture below also you can see me hiding the accessibility options by typing access.cpl.

Accessibility Options = access.cpl
Add Hardware Wizard = hdwwiz.cpl
Add or Remove Programs = appwiz.cpl
Display Properties = desk.cpl
Game Controllers = joy.cpl
Internet Properties = inetcpl.cpl
Mouse Properties = main.cpl
Network Connections = ncpa.cpl
ODBC Data Source Administrator = odbccp32.cpl
Phone and Modem Options = telphon.cpl
Power Options = powercfg.cpl
Region and Language Options = intl.cpl
Speech = sapi.cpl
Sound and Audio Devices = mmsys.cpl
System Properties = sysdm.cpl
Time and Date = timedate.cpl
User Accounts = nusrmgr.cpl
Some of these are available on windows xp and some of these on windows vista or both. If you want to undo any applets you have hidden then just delete the string from the “dont load” key. once you have made the string close down the registry editor and the next time you open control panel the applet you entered will have gone.
thanks for reading
I have had people talking to me about how their CD/DVD drive isnt visible in windows explorer any more just after they have installed itunes onto their vista PC. There is a simple fix for this other than the extreme option of restoring your machine to factory settings.
What itunes does is it changes the upper-filters in the registry key for your CD/DVD drive so that windows doesn’t recognise it anymore so it wont be displayed in windows explorer.
BEFORE you do this please make a system restore point, you can make one of these by selecting “system restore” in Start > Accessories > System Tools.
All we need to do to fix this is to delete the upper filters from our CD/DVD drive registry key and re-boot so that windows then remakes at start-up.
-
Press the start button and in the search bar at the bottom of the start menu type “regedit”
-
Click on “regedit.exe” in the search results and then give permission when windows asks you to open the registry editor.
-
On the tree view in the left side of the registry editor find “HKEY_LOCAL_MACHINE” and maximise this
-
The in HKEY LOCAL MACHINE maximise SYSTEM
-
in SYSTEM maximise CurrentControlSet
-
In CurrentControlSet maximise Control
-
in Control Maximise Class
In the class tree their should be a list of keys with very long names (example: {0475BB51-5A02-4EE0-B36C-29040FAD2650}) click on the first one under Class and look to the right panel their should be information about that key and you need see if that key says “CD/DVD drives”, keep checking each key in the class tree until you find that.
Now once you have found the CD/DVD drives key in the right panel their should be upper-filters and lower-filters, delete these (note: there might be two lower and upper filters with the second set having a .bak extension make sure you don’t delete these if you do). once you have deleted these close the registry editor and re-boot.
Your drive should now be visible as windows makes a new set of lower and upper filters for the CD/DVD drives registry key.
Thanks for reading
Rename all your photos easier!
Posted on: December 3, 2007
Love all of your photos but hate having to rename each one of them individually? There are programs out their that will actually rename them all for you automatically but that means departing with your cash. well there is a way to rename all your photos in one go. Lets say you have taken photos of your birthday party you can then rename all of them as “my party” with a sequential number at the end. here’s what to do:
- Highlight all your photos you want to rename with a sequence number at the end
- Now right-click and click “rename”
- Type in your new name and hit enter
- Now all the highlighted photos will have that name with a sequential number at the end.
Ok so thats how to rename your photos in batches in either windows xp or vista.
I’m sure lots of people want to know this as those without vista feel left-out. Well you can get the performance gain that Ready-boost gives you on XP its just a bit more hidden away. lets face it Ready-Boost is a fancy word for making your USB Flash drive hold the computers page file.
Ready-Boost does not give you extra memory as such but having the page file on a USB flash drive makes it much faster than writing to your hard disk so applications will run faster. I have covered the Page File before if you want to know more about it in one of my previous posts https://wizardcreations.wordpress.com/2007/11/07/speed-up-your-computer-part-24/.
How to do it
OK here’s how to make your USB Flash Drive as a page file. I have made a video to show you how. as usual there is a download and a youtube video. right-click the link below and select save as to download.
www.wizardcreations.co.uk/PageFileFinal.wmv
Thanks for reading this post and check back soon for more how-to’s and computer advice!
How to install RAM
Posted on: November 15, 2007
Hi, this post is about how to install RAM. If you have read my other my posts on how to install RAM then you will have seen that in part 4 of how to speed up your computer i talked about getting the right RAM for your computer. Well now I’m going to show you how to install that new RAM. Just an apology at the start, The pictures are not that great I’m sorry. I need a better camera and will be on my to get things list for Christmas!
OK lets get started, Getting rid of cables and opening the case.
Firstly lets remove all the cables from the back of the computer accept the power cable and keep the mains on(don’t worry you wont get electrocuted).

Now to open the case, release any lock or screws on the left side of your case if you have a tower computer(or the top if you have a desktop machine). Once any safety locks or screws have been released get a grip on the side of the case and push towards the back of the case to slide the panel free.

De-Static yourself
Computer chips are very vulnerable to static electricity and it can short-circuit them. This counts for basically anything on the computer. The power supply is a way to De-static yourself, this is why i told you to leave the power in. Just touch the power supply for at-least a second with a hand before touching any computer parts.
Find a free slot and make sure the side locks are up.
We need to check whether your computer has a slot free to put an extra RAM chip in and then make sure that the RAM side locks are released before putting the RAM in. Your RAM will be located directly on the motherboard and will already have at-least 1 RAM stick already inside. At the free slot there should be two plastic locks at each side of the slot, you need to push this aside to allow room for the RAM to fit.

Installing the RAM
Ok make sure that you are discharged and take your new RAM. In the slot you have prepared(opened the side locks) place the RAM into the slot provided. The RAM will only fit one way. Make sure that you have the RAM in place then place both thumbs on each side of the RAM and push until you hear an audible click(this will be the side locks setting into place), the RAM does take quite a lot of pressure to fit(more than you would expect for something so small).
Replace the cables and boot!
OK now your done! replace the cables back into the computer. You should now be ready to do your first boot up of the computer. Do your first boot of the computer without the case side on just in-case something is wrong. Once the system is started up it should automatically recognise the new memory.You can right-click on my computer and select properties to view the new amount of RAM that you have.
Got a problem?
If windows fails to recognize the new RAM or just doesn’t start-up at all then:
- Turn of the computer
- Remove all cables(except power cable)
- De-static yourself
- Check that the RAM module is properly secured inside its slot.
- If the RAM is seated properly but the locks are not setting then remove the module and re-insert.
If that hasn’t helped you then you either have the wrong memory type or you have faulty RAM. You will need to get a replacement from your supplier.
Well i hope nothing does go wrong for you when installing your new RAM. Thats the end of this post and thanks for reading. I will soon be doing a guide on how to setup and share files with another computer so keep on checking for a new post!
TechXP Forum?
Posted on: November 15, 2007
Since i started TechXP I’ve wanted the inclusion of a forum. This is because it will help people ask questions and get advice about their problems (with computers). I need to know if its the right time so your comments will be very appreciated here. firstly though im going to list a few Pros and Cons of having a forum.
Pros
People can communicate in discussions and help other users
All sorts of media can be posted
anyone can join
Its always there 24/7
Cons
I would be extra work for me
If it gets too busy i would need moderators
Not too many of either there but i tried to think of Pros and Cons that are realistic to this specific forum.
The Pros outweigh the Cons but a forum is nothing without users (i guess lack of users could be another Con) so i need people support!
well this was a very short post compared to my other ones but i hope the comments will make up for that! The question is forum or not?
My post on how to install memory is coming soon as promised in previous post (https://wizardcreations.wordpress.com/2007/11/11/speed-up-your-computer-part-44-readyboost-and-extra-ram/).
Speed up your computer part 4/4: ReadyBoost and extra RAM
Hi, this is the last part of how to speed up your computer with little or no cash. Our other parts are
- Part 1 (defragment your hard drive)
- Part 2 (The Page File)
- Part 3 (The HDD file system and MSCONFIG)
ReadyBoost
Remember what we talked about in Part 2 (The Page File)? If not then i recommend that you do so if you are just on this post for the readyboost feature. OK so are you running vista but you don’t have much memory inside your computer and you don’t want to open the case? Then look here because the new readyboost feature that is now included with windows vista helps you make your applications run faster.
How?
Readyboost uses a USB Flash memory stick and use that for the page file. how does this help? well using the page file on your USB Flash Drive means it will be much faster than any hard drive. This means that applications will run much faster because files and be can stored and used much faster.
Great! so how do i do it?
Well for starters you need a USB Flash Drive that has at-least 230MB free, you need to have a usb 2.0 compliant usb drive (don’t worry all flash drives are today even if you bought it a year ago) and some flash drives may not have the performance needed to make an impact.
To enable readyboost for your computer you need to:
- Plug your flash drive into any usb 2.0 port
- Go to my computer
- Find your Flash drive in the removable drives section
- right-click your flash drive and select properties

Now the properties window should show on your desktop you can:
- Go to the readyboost tab
- if you haven’t let the computer scan your flash disk then click the scan button
This is where some of you may encounter a point where you cant use readyboost because your flash disks don’t have the performance needed to enable readyboost. You may get a screen that looks like this(below):

If your flash drive has enough performance to qualify for readyboost then you can:
- First set how much megabytes you want readyboost to use (the more space it uses the better performance gain, there is also a recommendation at the bottom for optimal performance)
- Once finished, start the readyboost function by clicking the “Use this device” Radio button.

How to make your USB Flash drive compatible with readyboost
If windows has told you that your flash drive is incompatible this may be the fact that some little changes are in order to optimise the performance of your drive. Here are some tips to get the most out of your flash drive.
- Formatting the drive
- changing general properties
- changing hardware properties
Formatting the drive
- Go to my computer
- right-click your flash drive and click Format
- Make sure the file system is set to NTFS(don’t know what that is? look at Part 3 (The HDD file system and MSCONFIG))
- Set the allocation unit size to 4096
- click format the drive (NOTE: this will delete all files and folders on your disk so backup your information first!)
Changing General Settings
- Go to my computer and right-click your flash drive
- select properties
- in the general tab make sure that these two check-boxes are checked(below)
- Compress this drive to save disk space
- Index this drive for faster searching
- click apply
Changing Hardware Settings
- Go to my computer
- Right-click your flash drive and select properties
- In properties select the hardware tab
- In the hardware tab find your device in the list box
- Select your device and click the properties button
- In your device properties, in the general tab select change settings
- Now go to the policy’s tab and select optimize for performance radio button.
Forcing windows to enable readyboost
Now if the process above does not work for you (your drive may be missing the requirements by a very small amount) then you can force windows to enable readyboost for that device. I do not recommend doing this with a really old device as you may experience negative performance. Also this process requires tampering with the registry settings so if your not confident enough to do this then i suggest you just leave it.
ok here’s how to do it:
- Make sure your device is plugged in
- go to my computer
- right-click your device and select properties
- select the readyboost tab
- Check the “Do not retest this device” check-box
- unplug your flash drive
- click start and open “Run” (type run in start search)
- In the run dialog box type regedit and click OK
- Expand HKLM (Local Machine) > SOFTWARE > Microsoft NT > CurrentVersion > EMDgmt
- Find your device
- Change Device Status to 2
- Change ReadSpeedKB’s to 1000
- Change WriteSpeedKB’s to 1000
- Plug in your device
- go back to the readyboost tab
- Enable readyboost
I would recommend that people only with a lack of RAM use this process to force the device to be used because people with lots of ram but want to stop more files being used on the hard disk will not see a performance gain but a decrease.
Buying more memory
OK so one thing that’s much better than all the tricks that i have shown over the past 4 parts of my guide is buying more memory. Windows XP was quite memory hungry and vista is no different either (in-fact it needs twice the minimum amount of ram that XP needs). So if your system is slow and unresponsive the most cheapest and easiest Way to make your system faster is add more RAM.
What type of RAM do i need?
There is lots of different types of RAM and depending on how old you system is you may have to buy different RAM than what is front-lined on the market. There are tools that you can use to see what type of RAM that your system needs. You can use the crucial system scanner which will scan your system to see which type of ram your system uses and then recommend some RAM for you. You can find this here http://www.crucial.com/systemscanner/.
You can also use sisoftwares Sandra lite which is a diagnostic tool, this will give you loads of information on your computers specification. This may be too much information for beginners to computing. If your going to use sisoftwares Sandra lite then here’s the information that you need to look out for:
- The memory Speed(this will usually be a 4 digit number like 5300 or 3200)
- What technology it uses (most newer computers bought within the last two years will most likely use DDR or DDR2 RAM)
- Whether the RAM is Unbuffered
This information should be enough for you to look on the Internet or go to your local computer store and get the ram that you need. you can find sisoftwares Sandra lite here http://www.sisoftware.co.uk/.
OK so this is the end of the speed up your computer guide I will be posting soon a tutorial on how to install RAM in your machine soon, thank you for reading this post!
Get rid of FAT
If you have upgraded your computer from windows 95 or 2000(windows 98 cant be upgraded to xp you have to upgrade to windows 2000 first) then your hard disk may still be using the old FAT32 file system. The FAT32 file system is slow and needs to be De-fragmented much more frequently than the newer NTFS file system.
Checking you file system
- Go to my computer
- find your hard disk and right click
- select properties
- on the general tab your file system will be listed near the top of the window

Changing your file system to NTFS
If your file system is NTFS then you can easily change this by going into the command prompt. here’s how.
- Click Start and open “Run”
- in “Run” type cmd and click OK
- In the Command Prompt type convert [your drive letter]: /fs:ntfs
- Press enter, your computer will say “windows needs to restart to make the changes”
- restart your system
- once restarted the computer will convert the file format and then reboot twice

Using MSCONFIG to change the start-up programs
MSCONFIG also known as the System Configuration Utility can be used to change the start-up programs and services that windows will load. This will speed up your computer by freeing up more system resources. To open MSCONFIG
- Click Start and open “Run”
- type msconfig and click OK
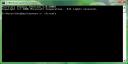
You should now be in a window that looks like this(below):

Now to change the start-up programs and services:
- Go to the start-up tab
- In the list box you can see all the programs and services
- Uncheck the boxes to stop a program or service
- The name of the service or program is on the left
- Don’t stop a program or service unless you are sure you know what it is and does. if you dont know then keep it on.
- Click OK once finished
Now you will be asked to restart your computer to put the changes into effect.
- Restart your computer
- Once the desktop has loaded a message box should appear saying “you have edited the start-up programs with MSCONFIG”
- If you don’t want this message to appear every time you start-up then click the check-box “don’t show this again”
- Click OK
OK this concludes Speed up your computer part 3 and in the next part i will probably be talking about Ready-Boost for those vista users and adding more memory to you computer.
thank you reading this post!
Use little or no money
Giving your computer a little turbo boost if its lost its spark over the years is easy with some basic maintenance and a little money. Those that spend are going to get the best performance but for those that don’t want to spend anything extra will still see a good performance gain provided you don’t already do what I’ve shown(and about to show).
Increasing the page file
Changing the way the page file operates and increasing its size will help your performance. It will save CPU(central processing unit, the brain of the computer) recources and your computer will have more room for windows to store system files which are important to running programs.
The page file explained
The page file is a section on your hard disk that has been reserved to act as though it where RAM(Random Access Memory), RAM is your computers memory that handles data that is sent to and from the CPU.
Take this example, you type a letter on Microsoft word and this data gets sent through the keyboard to your computer. The CPU will need to process this data and send instructions to the monitor to display this new letter, the only problem is the keyboards language is different from the CPU’s and the monitors language is different as-well, how to they understand each other? well that’s where the RAM comes in, it takes the data between and sorts it into a set of instructions that the CPU and other input(keyboard) and output(monitor) devices can understand. So essentially the more memory you have the more operations your computer can do at once.
The problem with the page file
So the page file acts as RAM, Great i don’t have to upgrade my computer! unfortunatly this isnt the case the page file is on the hard drive and compared to the speed of the memory the page file is like a 91 year old with stilts, it just isn’t near as fast as the ram and depending on the page file to give you permanent performance increase wont happen. Increasing the page file if you are experiencing slowness on your computer is really only a temporary action before buying extra memory.
So how do i do it?
Right so now we know more about the page file we can begin to increase the page file. I have made a short video on how to do this below. I am showing you how to do this on windows vista but their is basically no difference between doing this on vista and on xp.
Ok so i have included a youtube version of my video. This may be too small so i have included a download from my website www.wizardcreations.co.uk below. just right-click the link below and select “save as” to download.
www.wizardcreations.co.uk/PageFileFinal.wmv
Thank you for looking at my post.
Speed up your computer in this simple to-do tutorial with hardly any cash.
Your computer not a spry as it was? There are a couple of steps to do to make your computer faster if your having performance problems and in part 1 of this 4 part guide I’m going to show you how to do 1 of performance increasing tasks.
De-fragment your hard drive
De-fragmenting your hard drive is simple and easy to do with absolutely no risk of loosing any files. Even if it does sound a little daunting, its very easy to do with this simple video guide i made below.
Video Guide on De-fragmenting your hard drive.
instead of just showing you how to do it i thought i might put the extra effort in and tell you more about why you should De-fragment your hard drive and what it really does. Now i’ve included a youtube version of this video but it may be two small for those without hawk eyes so ive also included a download from my website www.wizardcreations.co.uk. right click the link below and then select “save as”.
www.wizardcreations.co.uk/Defrag.wmv
Thanks for looking at this post

